
In preparation for a little trip that I’m going on in a few weeks, I’ve decided to make myself a little pocket watercolor palette that I can easily fit into my travel bag and quickly set-up anywhere, anytime with little effort. Here’s what you need to make one for yourself.
Materials:
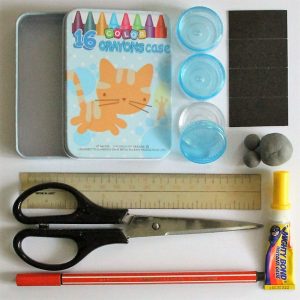
1. Tin Case
- Select your case according to the size you want. For this travel palette, I looked for a tin case that could fit into my pocket and that could house at least 6 pans.
- I made sure the inside of the case was white so that it could serve as a mixing surface.
- Initially, I wanted a case with a hinged cover, but I settled for this crayon case instead. I purchased this one from the toys and school supplies section in Landmark Department Store in Trinoma, Quezon City.
2. Containers to serve as paint pans (must have flat bottoms)
- Some options for paint pans include
- Bottle caps
- Make-up containers
- Used tealight containers
- I found my pans in the make-up section, also at Landmark
- NOTE: I accidentally dropped the little containers a few times while working with them. The lid part is made of very thin plastic that cracks easily after a few falls. Containers made from stronger plastic should be considered.
3. Magnetic Patches
- I bought these peel-and-stick magnetic patches from Handyman hardware store a few years ago and didn’t find a use for them again until now.
- I’m not sure if they are still available at that store, but I’m sure there are craft supply stores that have them.
4. Watercolor tube paint, colors of your choosing
- For trial purposes, I used my old student grade Pentel watercolors instead of my new Holbein paints.
5. Binder clips
- You’ll need at least 2 of these especially if your case doesn’t come with a hinged cover.
- Get binder clips of 2 different sizes for use as pen or brush holders.
6. Optional Materials
- Watercolor board or paper, for color chart insert
- Small rag or folded paper towels to fit into the case
Total Cost:
- 75-100PHP (not including watercolor paint and brush)
Assembly Time:
- 10-15 minutes
Assembly Steps:
1. Make sure everything is clean.
- Wash with soap and water if necessary. Dry thoroughly.
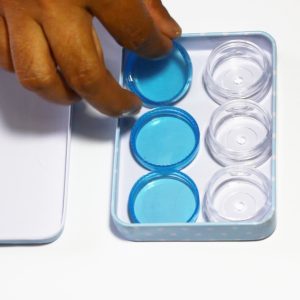
2. Decide how you want to arrange your pans in your case.
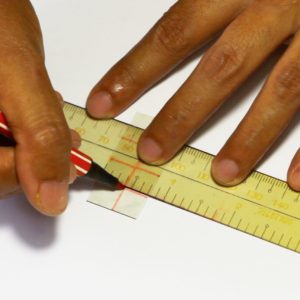
3. Measure and cut magnetic patches to appropriate size to fit on the bottom of the pans.
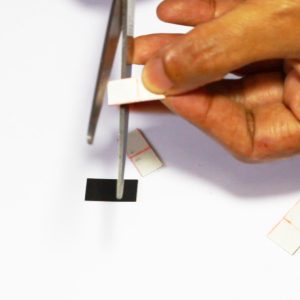
4. Stick the magnetic patch on the center of the bottom of each pan.

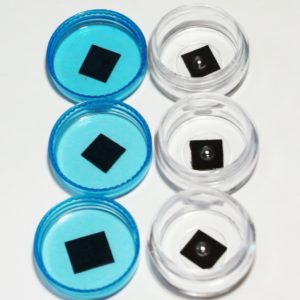
- Using magnetic patches, your pans will not easily slide out of place even if the palette is held at an angle or flipped over (i.e. if the pan is not too heavy).
- The advantage of using magnets is that your palette is easier to configure to meet your watercolor needs. You can even quickly transfer your colors to a larger case that can accommodate more colors.
- Note that rough shaking will still dislodge the pans. The larger the surface area of the patch, the stronger the magnetic contact between your pan and metallic surfaces.
- ALTERNATIVE: If you can’t find magnetic patches, you can use adhesives, clay or a kneaded eraser cut down to size to secure your pans in place.
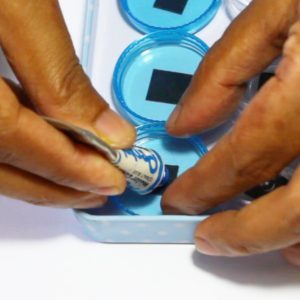
5. Squeeze your chosen paint colors into the pans.
- If your containers are similar to mine, use the larger bottom part for loading larger amounts of colors that you use often, and the smaller lid part for smaller amounts of colors that you use less often.
- Leave case open for paint to dry for around 24 hours. You’ll be able to revitalize paint with just a touch of water.
Finished!
- Here’s how to set-up your Pocket Watercolor Palette using binder clips.
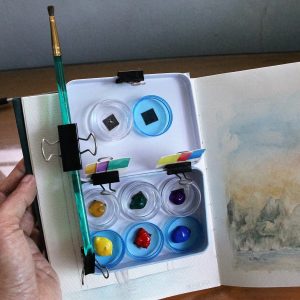
- Everything packed away and ready for travel!
